Starting Cadence to use
Spectre
Starting IC Front To Back
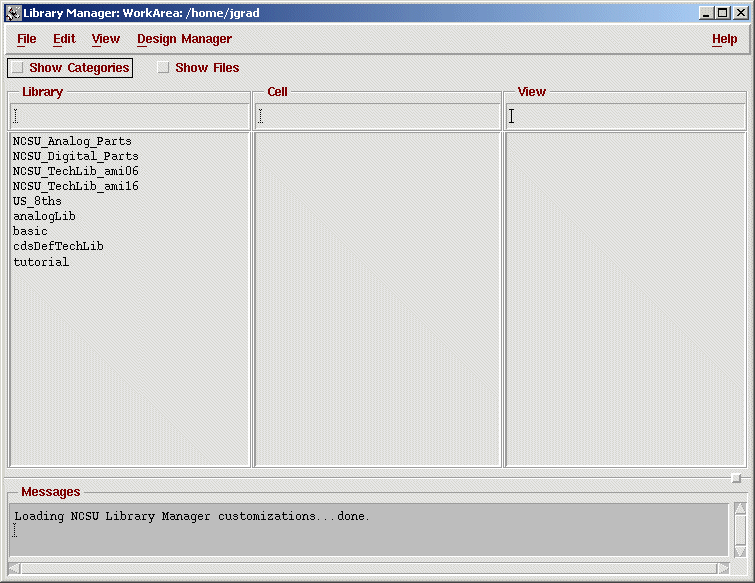
To get started, make sure you source the appropriate scripts, then run "icfb&" from your home directory. You should at least see the CIW window at the bottom and possibly the "Library Manager". If not, do a "Tools | Library Manager" in the CIW window. Your Library manager should look similar to this:

If you have all the NCSU libraries setup, you are ready to go. If not, you need to modify your library path:
Setting up the library path
You need to make sure that you have all the NCSU libraries setup. To do so, in your Library Manager select "Edit | Library path" and compare to the following setup:

Add all NCSU libraries you are missing. Enter the full path in the "Path"-field and the last directory in that path as the libray name in the according "Library" field. Then do "File | Save" and close the window.
Creating a Library
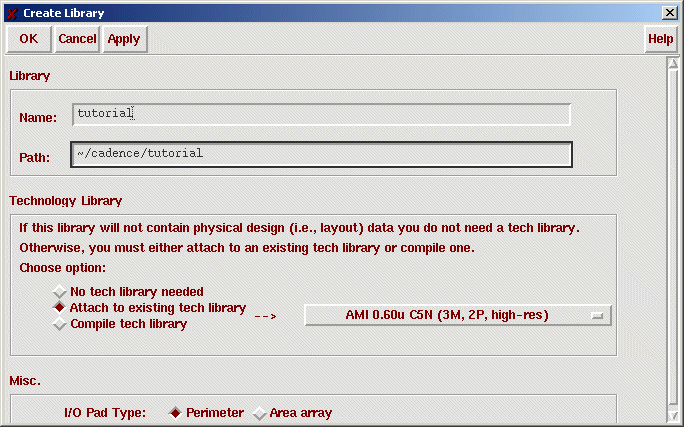
It is a good idea to create a directory in your home directory to hold all your cadence libraries. Every library will then be simply a subdirectory in that directory. Now to create a new library in the "Library Manager", do "File | New | Library...":

Choose a name and a directory for your library and attach it to the Ami 0.6um process, the best choice for most problems. Unless you wan to create Layout with pcells you do not need to build a new techfile.
Schematic capture
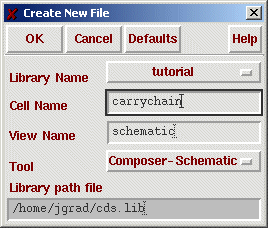
For this tutorial, we will simulate the carry-chain of a static 2 bit CMOS adder. Add a new Composer cellview in the library you just created, by selecting "File | New | Cellview...":

and enter the following schematic (just enter one half and use copy&paste). To insert an instance of a library part, hit "i". You will need the following parts:
- NCSU_Analog_Parts | nmos | symbol
- NCSU_Analog_Parts | pmos | symbol
- NCSU_Analog_Parts | vdd | symbol
- NCSU_Analog_Parts | gnd | symbol
For all N and P devices you only need to modify the field "Width". To do so, click the transistor with the left mouse button to select it, then hit "q" to open its properties.
To draw wires, hit "w". To create ports, hit "p". Then choose the desired direction and enter the name. Create only one port for each I/O signal. After a port is created, use labels to reference a signal: hit "l", type the signal name, and click on the piece of wire you want to label. This is a very useful feature to cut down on excessive wires: all wires that are labeled with the same name will be connected to one net.

Now do "Design | Check and save" until you are free of errors. Possible errors are displayed in your CIW window. Often the problem is that nodes are not connected or that a 4-way cross, which is forbidden, is created. If you use symbols later, the pins in the symbol have to match with the pins in the schematic.
Start Analog Artist
Once your schematic is error free, we are ready to start simulation with Analog Artist and Spectre. To do so, select "Tools | Analog Environment", which will start Analog Artist.


